Red blinking dummy cameras mounted in visible yet unobstructed corners deter criminals by simulating actual surveillance. Follow Fake Camera Corner Mounting Instructions to select clear locations, prepare sturdy surfaces, install brackets, position cameras, connect power, and test functionality for an effective and aesthetically integrated security system.
“Transform your space with the strategic placement of a dummy camera red blinking light—a cost-effective, game-changing security solution. This comprehensive guide offers detailed instructions on installing these devices in optimal corner locations, enhancing home or business security without breaking the bank.
Learn how to choose the perfect mounting spot, follow a step-by-step setup process, and perform final checks to ensure maximum effectiveness. Discover Fake Camera Corner Mounting Instructions for an efficient DIY installation.”
- Understanding Dummy Camera Red Blinking Light
- Choosing the Ideal Corner Mounting Location
- Step-by-Step Installation Guide
- Final Touches and Testing Procedures
Understanding Dummy Camera Red Blinking Light
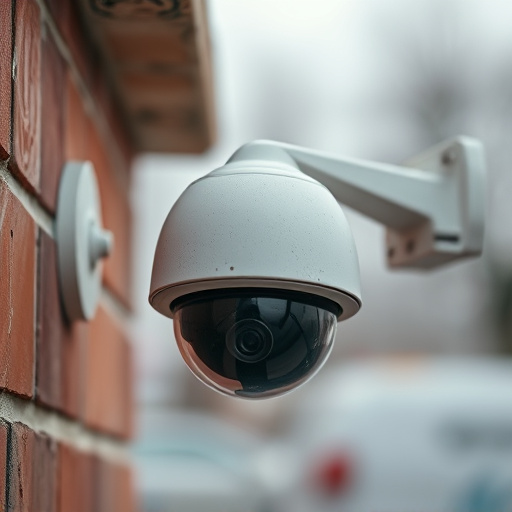
The dummy camera red blinking light is a creative and effective deterrent for criminals, offering a simple yet powerful solution to enhance home or business security. This innovative device mimics the presence of an actual surveillance camera, deterring potential intruders through visual deception. By strategically placing this fake camera with its distinctive red light in visible areas, individuals are less likely to attempt unlawful entries.
Understanding how to correctly mount this component is key to maximizing its effectiveness. Fake camera corner mounting instructions typically involve securing the device at a height that provides an unobstructed view of the target area while ensuring it blends seamlessly into the environment. This discreet placement encourages potential thieves to believe they are under constant surveillance, thereby discouraging criminal activity.
Choosing the Ideal Corner Mounting Location
When selecting a corner mounting location for a dummy camera, it’s crucial to consider both aesthetic and functional factors. Opt for an area that offers clear visibility and aligns with your security or surveillance needs. Corners near doors, windows, or intersections are popular choices as they provide strategic coverage. Ensure the surface is sturdy enough to support the weight of the camera, and check if there’s easy access for future adjustments or maintenance.
Follow these fake camera corner mounting instructions: survey the area for potential obstructions like furniture or decor, choose a height that offers a clear view without being too prominent, and secure the mount firmly using appropriate hardware. This thoughtful placement will enhance the overall effectiveness of your security system while maintaining a subtle presence.
Step-by-Step Installation Guide
Step-by-Step Installation Guide for Fake Camera Corner Mounting
1. Preparation: Begin by gathering all necessary components – your dummy camera with a red blinking light, screws, and the corner mounting bracket. Choose a suitable location for installation, ensuring it aligns with your security or decor needs. Clean the surface area to ensure optimal adhesion.
2. Mounting Process: Attach the corner bracket securely to the wall using the provided screws. Ensure the bracket is level by double-checking its alignment. Next, carefully mount your dummy camera onto the bracket, following manufacturer instructions. Once in place, connect the power supply and activate the red blinking light for a realistic effect.
Final Touches and Testing Procedures
Once all components are securely installed, it’s time for the final touches. This includes ensuring each dummy camera’s red blinking light is functioning correctly and aligning them with your desired setup. Use the Fake Camera Corner Mounting Instructions to attach any additional accessories or mounts needed for a seamless integration into your chosen location.
Before unveiling your installation, conduct thorough testing procedures. Check that all lights are illuminating as intended, and each camera’s red blink sequence is synchronized. Test various scenarios, such as moving through different angles and distances, to verify the dummy cameras’ responsiveness and realism. This step ensures a polished final product that effectively deters potential intruders while enhancing your space’s security aesthetics.
The dummy camera red blinking light installation process, as outlined in this guide, offers a simple yet effective solution for enhancing home or business security. By strategically placing a fake camera with its distinctive red light in a corner, you create the illusion of a vigilant surveillance system. Following the step-by-step instructions and choosing the ideal mounting location will ensure optimal visibility and deter potential intruders. Remember, while this is an affordable option, it complements real security measures for comprehensive protection. With the right setup, your property will benefit from enhanced safety without breaking the bank.